My youngest, Ella, is a terribly picky eater. Packing her school lunch is a challenge. One day she loves hard boiled eggs, the next she doesn't eat it. So, I usually pack her a lot of little things, and it's anyone's guess what she will choose to eat that day. One things she will eat every single time though is a soft pretzel.
I usually buy a humongo box of the frozen ones from Sam's Club and then just pop one into the microwave in the morning and wrap it in some foil. Sunday evening I just had this wild idea to just try and make some homemade ones and they were really quite easy to make. And, you probably have everything you need in your pantry already!
Ingredients
4 teaspoons active dry yeast
1 teaspoon white sugar
1 1/4 cups warm water (about 110 degrees F)
4-5 cups all purpose flour*
1/2 cup white sugar
1 1/2 teaspoons salt
1 tablespoon vegetable oil
4 cups hot water
1/2 cup baking soda
Toppings of your choice
Cinnamon Sugar
Kosher Salt
Butter
In a small bowl, mix the yeast, sugar and hot water. Let sit till the yeast and sugar dissolve and has a creamy consistency. About 5 to 10 minutes.
In a large bowl (I use my KitchenAid mixer) mix together the flour, sugar and salt. Make a well in the center and pour in the yeast mixture and the oil. Mix well until all the ingredients are incorporated. I mix it for about 3 minutes in the KitchenAid - and no kneading it required!
Your dough should be nice and smooth. If it is too sticky, add some flour. If it's too dry and water a teaspoon at a time. Place the dough in an oiled bowl, cover with plastic wrap and let it rise till it doubles in size. Approximately one hour. (I have a proof function in my oven. You can also just turn on your oven light and place the dough in there. This serves as a nice warm, draft free place for your dough to rise.)
Preheat your oven to 450 degrees. (425 for a convection oven)
Line two baking sheets with parchment paper, or spray the baking sheets with cooking spray. Dissolve the baking soda in hot water.
Divide the dough into 12 equal pieces. Roll the dough out into a thin rope and shape into a pretzel shape. I did not need to use any flour when rolling these out. If your dough is sticky you may need to flour your surface. Dip each pretzel into the baking soda solution** and place on the cookie sheet.
Bake for about 8 minutes until browned.
When the come out of the oven I brush them with melted butter. At this point you can sprinkle them with kosher salt or cinnamon sugar.
My first batch of pretzels was completely consumed by breakfast the next morning. I made a second batch and I just buttered them and didn't add salt or anything. I figured we can add whatever topping we want when we heat the pretzels back up.
*Here in hot and humid Florida I use 4 1/2 cups of flour. I start out with four and then add more in to get the consistency I want.
**Dipping the pretzels into the baking soda solution gives the pretzels the dark chewy exterior we like in a pretzel. Apparently the baking soda causes some sort of scientificy chemical reaction once you pop them in the oven.
Monday, November 12, 2012
Monday, October 29, 2012
Homemade Laundry Detergent
Since moving to Florida, our grocery bill has gone up significantly, so I have been looking for ways to save a few pennies where we can. One of my neighbors in Missouri made her own detergent and gave me some to try and I thought it worked very well. Another friend of mine made the liquid kind and is also happy with the results.
Homemade laundry detergent is all over blogs and Pinterest at the moment. I read quite a few "recipes" and lots of comments and decided on this powder version. I decided against liquid, because the powder seemed easier to store. Everything I needed was all in one spot in the laundry aisle at my local Walmart.
1 - 4 lb 12 oz box of Borax
1 - 4 lb box of Pure Baking Soda
1 - 3 lb 7 oz box of Washing Soda
1 - 3 lb box of Oxi Clean
3 - 5.5 oz bars of Fels Naptha Soap
1 - 13.2 oz container Downy Unstoppables
I used one of my empty storage tubs to mix everything in. It was way bigger than I needed but worked out just fine. First I threw everything except the Fels Naptha soap in. My six year old had fun mixing it with a wooden spoon.
Then I grated the Fels Naptha Soap, Cause I'm lazy, I threw it into the food processor. (Then I cautioned my six year old that this was NOT grated cheese and she couldn't eat it!)
Add this to your mix and give it a stir. And that's it! Place it in the container of your choice and place in your laundry room. You'll need 1-2 tablespoons per load.
The oxy clean that I bought had a little scooper in it, so I marked it with a sharpie (I am using two tablespoons in my High Efficiancy washing machine)
All the "ingredients" cost about $25. If you wanted to cut your cost even further, you could leave out the Unstoppables.
So far it is working out just great. I have a top loader High Efficiency washing machine. I wash most everything on the "Tap Cold" setting. UPDATE: I am almost out of my laundry detergent. I have enough left for a few loads. And I have to say, we do a LOT of laundry around here - I do at least one load a day and on many days, more than one. And I'm kinda sloppy with the measuring. So, it lasted us about five months!
This detergent has a nice fresh, clean scent but it is not very strong. As far as scent goes, you will not get that strong fragrance like you do with traditional detergents like Tide or Gain. I use traditional dryer sheets so I am still getting plenty of that fresh laundry scent. (I have heard that some people add essential oils to their mixture which would seem easier if you are making the liquid kind.)
This is not a "sudsy" detergent. If you need to see lots of bubbles to get a warm fuzzy that your clothes are clean, than this detergent is probably not for you.
If you let one of your kiddos help you with this, make sure they do not stir the mixture too vigorously. You don't want them to stir up all that fine powder and inhale it down into their lungs.
Happy Laundering!
If you would like to try the liquid variety, this is the recipe that my friend used:
http://www.duggarfamily.com/content/duggar_recipes/30455/homemade_liquid_laundry_soap_front_or_top_load_machine_best_value
They also have a few ideas for inexpensive Fabric Softener.
Homemade laundry detergent is all over blogs and Pinterest at the moment. I read quite a few "recipes" and lots of comments and decided on this powder version. I decided against liquid, because the powder seemed easier to store. Everything I needed was all in one spot in the laundry aisle at my local Walmart.
1 - 4 lb 12 oz box of Borax
1 - 4 lb box of Pure Baking Soda
1 - 3 lb 7 oz box of Washing Soda
1 - 3 lb box of Oxi Clean
3 - 5.5 oz bars of Fels Naptha Soap
1 - 13.2 oz container Downy Unstoppables
I used one of my empty storage tubs to mix everything in. It was way bigger than I needed but worked out just fine. First I threw everything except the Fels Naptha soap in. My six year old had fun mixing it with a wooden spoon.
Then I grated the Fels Naptha Soap, Cause I'm lazy, I threw it into the food processor. (Then I cautioned my six year old that this was NOT grated cheese and she couldn't eat it!)
Add this to your mix and give it a stir. And that's it! Place it in the container of your choice and place in your laundry room. You'll need 1-2 tablespoons per load.
The oxy clean that I bought had a little scooper in it, so I marked it with a sharpie (I am using two tablespoons in my High Efficiancy washing machine)
All the "ingredients" cost about $25. If you wanted to cut your cost even further, you could leave out the Unstoppables.
So far it is working out just great. I have a top loader High Efficiency washing machine. I wash most everything on the "Tap Cold" setting. UPDATE: I am almost out of my laundry detergent. I have enough left for a few loads. And I have to say, we do a LOT of laundry around here - I do at least one load a day and on many days, more than one. And I'm kinda sloppy with the measuring. So, it lasted us about five months!
This detergent has a nice fresh, clean scent but it is not very strong. As far as scent goes, you will not get that strong fragrance like you do with traditional detergents like Tide or Gain. I use traditional dryer sheets so I am still getting plenty of that fresh laundry scent. (I have heard that some people add essential oils to their mixture which would seem easier if you are making the liquid kind.)
This is not a "sudsy" detergent. If you need to see lots of bubbles to get a warm fuzzy that your clothes are clean, than this detergent is probably not for you.
If you let one of your kiddos help you with this, make sure they do not stir the mixture too vigorously. You don't want them to stir up all that fine powder and inhale it down into their lungs.
Happy Laundering!
If you would like to try the liquid variety, this is the recipe that my friend used:
http://www.duggarfamily.com/content/duggar_recipes/30455/homemade_liquid_laundry_soap_front_or_top_load_machine_best_value
They also have a few ideas for inexpensive Fabric Softener.
Labels:
household,
laundry detergent
Friday, September 14, 2012
The "Homework Station"
Our old house was a one story. The kids kept their backpacks and school supplies that they weren't using in their rooms. Supplies, like paper, pencils etc were kept in plastic drawers on top of the fridge.
Our new home is a two story, and since we usually do homework at the kitchen table, where I cankeep a crack the whip keep an eye on everyone , I thought we needed a different way to organize our homework stuff. Cause you know if you have to send them upstairs to find something they are bound to get distracted and who knows when they will come back down again. So what I wanted was, one central place to keep everything.
I love these Closetmaid Cube storage thingies. I picked this one that is three cubes wide by three cubes high. It works out perfectly since I have three kids.
Above it, I hung three white boards. Here we write little reminders about things that are important for the upcoming week.
On the top shelves:
We have plastic drawers with lined paper for homework, blank paper for drawing, markers, pencils, scissors, glue sticks, erasers, calculators etc.
On the bottom shelves:
The middle row of shelves:
I gave each kid their own cubby in the middle row. Here they can put their own personal school stuff. Riley has the kind of schedule where he has half of his classes one day, and the other half the next day, so he can leave the books he doesn't need here. This is also a good place for them to leave long term projects, so we know exactly were everything is.
On the very top of the whole thing, we have dry erase markers, magnets that we can also use for our dry erase boards and our electric pencil sharpener. The basket holds our keys and sunglasses (This just happens to be a convenient place for them) The binder is labeled "Our School Day" Inside is all the information for each of the kids schools. I have a quick cheat sheet in the front that just says what time each kid gets on and off the bus, who their teacher is and what classroom number. (You know, in case I got hit by a bus or something and someone else had to get them off to school.) I also have their individual class schedules, lunch menu's etc. A lot of this stuff is on my laptop but I like having it all in one place where we can just glance at it. (And you know, that whole hit by a bus thing again)
Anyway, this has worked out really great for us. If Ella wants to draw, she can just grab some paper and just grab the markers drawer and bring them to the table. And the kids don't have to go far for any supplies that they need when doing their homework. We know exactly where everything is!
Our new home is a two story, and since we usually do homework at the kitchen table, where I can
I love these Closetmaid Cube storage thingies. I picked this one that is three cubes wide by three cubes high. It works out perfectly since I have three kids.
Above it, I hung three white boards. Here we write little reminders about things that are important for the upcoming week.
On the top shelves:
We have plastic drawers with lined paper for homework, blank paper for drawing, markers, pencils, scissors, glue sticks, erasers, calculators etc.
On the bottom shelves:
- On the left we have some misc stuff (right now it's the kids fundraisers from school)
- In the middle we have our dry erase boards that we use instead of scratch paper and that Ella also uses to practice her spelling. We also have our three hole punch and other misc stuff that doesn't fit in the plastic drawers.
- On the right side are some of our teaching tools that we use at home, like flash cards, stickers and workbooks.
The middle row of shelves:
I gave each kid their own cubby in the middle row. Here they can put their own personal school stuff. Riley has the kind of schedule where he has half of his classes one day, and the other half the next day, so he can leave the books he doesn't need here. This is also a good place for them to leave long term projects, so we know exactly were everything is.
On the very top of the whole thing, we have dry erase markers, magnets that we can also use for our dry erase boards and our electric pencil sharpener. The basket holds our keys and sunglasses (This just happens to be a convenient place for them) The binder is labeled "Our School Day" Inside is all the information for each of the kids schools. I have a quick cheat sheet in the front that just says what time each kid gets on and off the bus, who their teacher is and what classroom number. (You know, in case I got hit by a bus or something and someone else had to get them off to school.) I also have their individual class schedules, lunch menu's etc. A lot of this stuff is on my laptop but I like having it all in one place where we can just glance at it. (And you know, that whole hit by a bus thing again)
Anyway, this has worked out really great for us. If Ella wants to draw, she can just grab some paper and just grab the markers drawer and bring them to the table. And the kids don't have to go far for any supplies that they need when doing their homework. We know exactly where everything is!
Labels:
homework,
New Home Chronicles,
organization
Monday, July 2, 2012
Meal Planning
Wow - I haven't posted here for a while. Things were crazy around here. In a nutshell - a trip to Florida to buy a new house, an immediate family member diagnosed with cancer, the end of the school year, and packing two houses for moves to two different states!
Anyway, here we are in sunny Florida. We are still getting used to the Southern way of life, but one thing I have quickly learned, is that groceries are very expensive here. There are only two major grocery store chains here. They don't double coupons or have loyalty cards and such, like much of the rest of the country.
And the local grocery store is not that close - it"s a 15 minute drive one way. Sam's Club is 30 minutes away. (No more running over there for a cheap rotisserie chicken!) So I guess my old system of running to the store and picking up whatever looks good is probably not going to work out real well anymore.
So I'm going to try meal planning. I heard about this website called emeals.com For a small subscription fee, they provide you with a meal plan, that is planned around the sales at your local grocery store. I have some pretty picky eaters in my household, so I don't expect all the suggested meals to work for us, although they are pretty family friendly. But even the meals that won't necessarily work for us, prompted a meal idea or could be modified to work for us. And there is usually one crock pot meal included for the week.
So here is our meal plan for this week July 2nd thru July 8th
Monday: Sweet and Sour Pork with steamed Rice
Tuesday: Sausage Simmer with Pasta
Wednesday: Rosemary Chicken & Veggies (Crock Pot meal!)
Thursday: Breakfast Frittata w/Crispy Bacon
Friday: Hamburgers w/Steak Fries
Saturday: Chicken Alfredo with Salad and Texas Toast
Sunday: Crock Pot Roast, Mashed Potatoes, Corn and Rolls
What's for dinner at your house?
Anyway, here we are in sunny Florida. We are still getting used to the Southern way of life, but one thing I have quickly learned, is that groceries are very expensive here. There are only two major grocery store chains here. They don't double coupons or have loyalty cards and such, like much of the rest of the country.
And the local grocery store is not that close - it"s a 15 minute drive one way. Sam's Club is 30 minutes away. (No more running over there for a cheap rotisserie chicken!) So I guess my old system of running to the store and picking up whatever looks good is probably not going to work out real well anymore.
So I'm going to try meal planning. I heard about this website called emeals.com For a small subscription fee, they provide you with a meal plan, that is planned around the sales at your local grocery store. I have some pretty picky eaters in my household, so I don't expect all the suggested meals to work for us, although they are pretty family friendly. But even the meals that won't necessarily work for us, prompted a meal idea or could be modified to work for us. And there is usually one crock pot meal included for the week.
So here is our meal plan for this week July 2nd thru July 8th
Monday: Sweet and Sour Pork with steamed Rice
Tuesday: Sausage Simmer with Pasta
Wednesday: Rosemary Chicken & Veggies (Crock Pot meal!)
Thursday: Breakfast Frittata w/Crispy Bacon
Friday: Hamburgers w/Steak Fries
Saturday: Chicken Alfredo with Salad and Texas Toast
Sunday: Crock Pot Roast, Mashed Potatoes, Corn and Rolls
What's for dinner at your house?
Labels:
meal plan
Sunday, February 12, 2012
Turtle Cake
I usually don't post my cakes and cookies over here because I don't do tutorials for them or anything. All that stuff is posted on my other blog www.sweetshoppeblog.com
My friend Lynette asked me if I could make a turtle shaped cake for a baby shower that she was co hosting for her sister. "Sure" I said. I'd never made a turtle cake before.
This is what I came up with:
I made the turtle's body by using a sports ball cake pan. The head and legs were made with some cake that I just pressed together with a small amount of frosting (almost like making a cake pop) The hat is a fondant covered ice cream cone. I put the little guy on top of a buttercream frosted cake.
Labels:
turtle cake
Crochet Hat
Due to several sickies in our house today, we didn't go to church so I had a few unexpected free hours on my hands. I have been working on home improvement projects none stop, so I decided to do something creative with my time. I have been seeing all these cute hats online and also on real peoples heads.
Ciara had a bunch of yarn laying around so I just stole borrowed some from her.
Not to bad for my first attempt. I'm excited to try some different colors and patterns. You know ....... in all my free time ;)
Labels:
crochet
Friday, December 30, 2011
Best Waffles Ever!!
I purchased this on Black Friday. It's not super heavy duty or anything, but it was one of those screaming deals that I just couldn't turn down:
I immediately made a batch of waffles just using some Krusteaz Mix which is my go to mix for pancakes. Love how the pancakes turn out, but wasn't really happy with the waffles. They were okay.....but just okay. I wanted something a little better. So then I tried the Bisquick mix. Love it for making chicken pot pie. Waffles.....not so much. So I headed to the internet to find a recipe.
This is the recipe that resulted after experimenting with a couple of batches. This batter is much runnier than the box mix batter, but the waffles came out light, fluffy and crispy.
Waffle Batter Recipe
1 1/3 cups flour
4 tsp baking powder
1/2 tsp salt
1 1/2 tablespoons sugar
2 eggs separated
1/2 cup melted butter
1 1/2 cup milk
1 tsp vanilla
Mix together flour, baking powder, salt and sugar. Add in melted butter, milk, vanilla and egg yokes and mix well.
Place egg whites into mixer and beat until they start to get stiff (almost like you are making merengue)
Gently fold in the egg white mixture into your batter, just until you can't see them anymore.
Cook according to the directions of your waffle maker.
This makes more batter than I need for our family of five, but I usually just cook all of it and then put the cooked waffles in the fridge or freezer. Then I can just take them out and pop them in the toaster - they crisp right back.
Enjoy!
I immediately made a batch of waffles just using some Krusteaz Mix which is my go to mix for pancakes. Love how the pancakes turn out, but wasn't really happy with the waffles. They were okay.....but just okay. I wanted something a little better. So then I tried the Bisquick mix. Love it for making chicken pot pie. Waffles.....not so much. So I headed to the internet to find a recipe.
This is the recipe that resulted after experimenting with a couple of batches. This batter is much runnier than the box mix batter, but the waffles came out light, fluffy and crispy.
Waffle Batter Recipe
1 1/3 cups flour
4 tsp baking powder
1/2 tsp salt
1 1/2 tablespoons sugar
2 eggs separated
1/2 cup melted butter
1 1/2 cup milk
1 tsp vanilla
Mix together flour, baking powder, salt and sugar. Add in melted butter, milk, vanilla and egg yokes and mix well.
(Doesn't look very tasty yet!)
Place egg whites into mixer and beat until they start to get stiff (almost like you are making merengue)
Gently fold in the egg white mixture into your batter, just until you can't see them anymore.
Cook according to the directions of your waffle maker.
This makes more batter than I need for our family of five, but I usually just cook all of it and then put the cooked waffles in the fridge or freezer. Then I can just take them out and pop them in the toaster - they crisp right back.
Enjoy!
Labels:
bella waffle maker,
recipes,
waffles
Monday, December 5, 2011
Advent Calendars
Riley wanted this Lego Advent calendar this year. He has actually wanted one for several years and this year I was actually able to find one. (Note to self - look for advent calendars in September next time!)
The nice ones the girls were interested in were either sold out, or the sellers were over inflating the prices because they were so hard to find. So I ended up making my own.
I literally made these the morning of December 1st, so that they would be ready when the girls came home from school. Thank goodness for Amy of Living Locurto. She had some advent calendars available as a download on her amazing website.
I didn't quite make these quite like Amy did. I actually just stuck the punched out numbers to the background with double stick tape. Every day the girls pulled a number off and got to pick a prize out of a bag. Ella's prizes were Squinkies and Littlest Pet Shop toys. Ciara's prize was a jewelry kit that I broke down into little baggies. By Christmas she will have the entire kit. The girls loved these and couldn't wait to get their prize everyday.
Be sure to head over to Amy's site if you are ever in search of some really great ideas and printables.
The nice ones the girls were interested in were either sold out, or the sellers were over inflating the prices because they were so hard to find. So I ended up making my own.
I literally made these the morning of December 1st, so that they would be ready when the girls came home from school. Thank goodness for Amy of Living Locurto. She had some advent calendars available as a download on her amazing website.
I didn't quite make these quite like Amy did. I actually just stuck the punched out numbers to the background with double stick tape. Every day the girls pulled a number off and got to pick a prize out of a bag. Ella's prizes were Squinkies and Littlest Pet Shop toys. Ciara's prize was a jewelry kit that I broke down into little baggies. By Christmas she will have the entire kit. The girls loved these and couldn't wait to get their prize everyday.
Be sure to head over to Amy's site if you are ever in search of some really great ideas and printables.
Labels:
advent calendar,
Christmas
Tuesday, November 1, 2011
Diabetic Friendly Chocolate Chip Cookies
Ingredients:
2 1/4 cups flour
Directions:
Preheat oven to 350 degrees.
Add in flour gradually, and beat just until flour is incorporated. Mix in Chocolate chips.
2 1/4 cups flour
1 teaspoon salt
1/2 teaspoon baking soda
1/2 cup butter
1/2 cup Crisco Shortening
1/4 cup Splenda - Granulated
1/2 cup Splenda Brown Sugar Blend
2 eggs
1 1/2 teaspoons vanilla
1 cup milk chocolate chips
Directions:
Preheat oven to 350 degrees.
Mix together flour, salt and baking soda. Set aside.
In medium size mixing bowl. Mix Splenda Granular Sugar, Splenda Brown Sugar Blend, Butter and Shortening till nice and fluffy. Add in vanilla. Add in eggs one at a time beating after each addition.
Add in flour gradually, and beat just until flour is incorporated. Mix in Chocolate chips.
Drop by rounded teaspoon onto an ungreased non stick cooking sheet. Flatten the cookies slightly and bake for 10 to 12 minutes. Cool on a wire rack.
I like to use a small ice cream scoop when baking cookies. I flattened the cookies with the back of the scoop. I baked them on parchment lined cookie sheets. I got a total of 33 cookies.
Here's the nutritional info courtesy of LiveStrong
Labels:
cookies,
diabetic friendly
Wednesday, October 12, 2011
First Aid & CPR Training
August 11th, 2011 - First Aid and CPR Training
Mark off in Faith in God: Developing Talents
Next Activity: October 18th - Plan for Fall Festival
Bring your ideas for decorating a room at Fall Festival
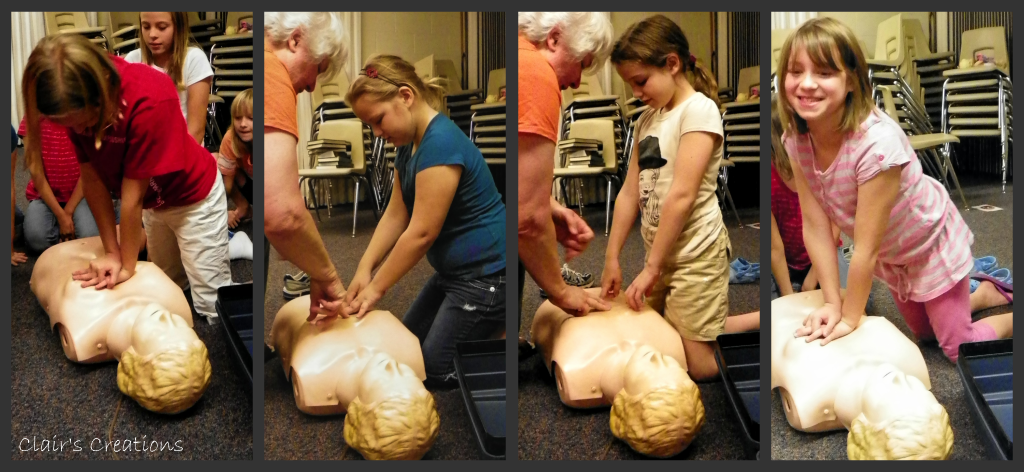
Since we recently had a lesson about babysitting, I thought it would be a great idea for the girls to learn about basic first aid and CPR. We are fortunate to have a former nurse in our ward, who was more than willing to come and teach the girls. The girls just love having guests come and teach the class.
Sister M. brought a CPR training doll with her that the girls were absolutely fascinated with. Her name is Annie. They each got a chance to perform chest compressions on CPR Annie. We also asked them to bring a baby doll to practice infant CPR.
Labels:
Activity Girls,
cpr,
first aid
Friday, August 12, 2011
Impromtu Trip to the Fabric Store
August 9th, 2011 Activity
Shopping Trip to the Fabric Store

Mark off in Faith in God: Developing Talents
Next Activity: August 23rd - Sewing our Scripture Tote Bags
Bring Scissors and any other sewing notions you can use.
It's been a crazy couple of weeks when it comes to Activity Girls. We've had to cancel, re-schedule and come up with a new plan. Different things came into play: girls out of town, conflicts with other organizations, and an almost identical event as we had planned held by the Relief Society. Sigh!
Monday rolled around and I was still trying to figure out what we were going to do. Something my daughter said to me inspired me.
So on Tuesday night, when the girls showed up at the Stake Center, I told them we were going on a field trip. Of course they all wanted to know where we were going but I wouldn't tell them.
I'm such a meanie!
So as we were driving along, the girls started speculating. When we were on the freeway, they thought we were going back to my house. Then they thought maybe we were going out for a food treat. Then when we were driving through a residential neighborhood, they thought maybe we were going to one of the absent girls house. Or maybe to a member's house. So I said "Yep, you guessed it. We are going to a member's house and we are going carolling. Have you ever heard of Christmas in August?" "Nooooo" they all reply.
Finally I pulled into a parking lot. The fabric store was right there but they still didn't get it. So, with a completely straight face, I told them I brought them out here cause I was going to teach them how to drive. They actually looked at me for a few seconds with that confused look on their face. You know the one where they are actually trying to figure out if you are serious or not. "Um......Really sister Jordan?"
"Oh yeah! And if you are really good, next week I'll teach you how to hotwire cars!" "Awesome!!!" yelled Miss M! The other girls are now understandably skeptical.
So I finally point out the fabric store and tell them we are going shopping for fabric to sew our own Scripture Tote Bags.
I gave them the following instructions:
(To be on their best behavior, and remember who we were representing)
To pick out two complementary fabrics of their choice.
Both fabrics had to be on sale and I limited them to one section of the store.
I was really proud of the girls. They helped each other choose and were on their best behavior. When we went to the cutting table, we asked for half a yard of each fabric. The girls were very polite and thanked the associate that helped us. The cashier was nice enough to bag their fabric choices individually so each girls could hang on to their own.

See Toyota dealer guy.....this is why I need an eight seater van!
I had such a blast shopping with these girls. Their enthusiasm is so contagious.
It was also fun to see the different fabrics that each girl picked out. I felt like I could match the fabric to the girls based on their personalities.
Can't wait for us to sew up some cute tote bags.
Hopefully this will encourage the girls to bring their scriptures every Sunday!
Labels:
Activity Girls,
tote bags
Saturday, August 6, 2011
Slow Roasted St Louis Style Ribs
I like Ribs but I don't love them slathered in BBQ sauce like most people do. I found this great recipe for a dry rub. The great thing is, you can slow cook them in this rub and then finish them off on the grill. Then if you are a sauce lover, you can slather it on and they still taste great. And the best part......the meat just falls right off the bone!
Dry Rub for Ribs
1/2 cup sugar
1/8 cup salt
1 1/2 tablespoon black pepper
1 tablespoon paprika
1 tablespoon garlic powder
Mix all the dry ingredients together. Trim excess fat of the ribs. My favorite to use lately has been St Louis Style. Generously pat the rub onto the ribs. I usually use half of the above rub on two racks of ribs and just save the rest in a Ziplock bag.
If I happen to plan ahead, (Hey it does happen once in a while!) I'll put the rub on the ribs the night before and just leave them overnight in the fridge. Or you can do it first thing in the morning if you don't plan on eating until later in the day. I like to use those disposable foil pans. I cut the ribs into sections of about 3-4 bones each and usually place about one rack in each pan. (I will admit however, that I have made these without any "marinating" time. Just put the rub on, and popped in the oven. They were still delicious!)
Then I hand them off to the hubby and he pops them onto a nice hot grill. Half of them get slathered in BBQ sauce. Around here, it's just something out of a bottle, but you could whip up your favorite award winning recipe if you like. Half of them stay plain jane! They don't have to stay on the grill long, just long enough to get a nice crust!
Get out some napkins and enjoy!
Itty bitty Quiches
With the first day of school right around the corner, I was digging around looking for some quick options for breakfast for my picky little eater as well as some lunch options.
My little one loves quiche so I thought we would give this recipe a try. Unlike a previous recipe that we tried that was disgusting that one came out quite yummy. And it's fun for the kiddo's to help out with too.
I adapted this from a recipe I found on Eating Well
5 eggs
3 egg whites
1/2 cup milk
1/2 cup shredded cheese
8oz cubed ham and turkey
1/8 tsp seasoned salt
1/2 tsp fresh ground pepper
Preheat oven to 325 degrees. Because I am lazy and don't like to scrub pots and pans I lined a regular muffin pan with paper liners and then sprayed them with pan. I really don't want these quiches to stick!
In a large measuring cup, beat the eggs and milk together along with your seasonings. I used 2% milk cause that's what was in my fridge. You could even use egg beaters if that's what floats your boat.
In the lined muffin cups, evenly distribute the cheese and the ham and turkey. I used some chopped fresh deli meat. You can use anything you love in quiche here. (Or that your picky eater kid will eat!) Sausage, mushrooms, spinach, asparagus, bacon, green onions etc. Use any kind of cheese that you like too. I used a shredded cheese blend. Next pour in your egg mixture. I had enough for 11 mini quiches.
Pop them in the oven and bake for 25 mins until nice and golden brown. Allow to cool in pan for about 5 minutes and then remove them to a wire rack. Refrigerate any leftovers for up to 3 days.
If these are a big hit in your household, make a big batch of them and you can freeze them for up to a month. Once fully cooled, wrap in plastic and place in freezer. To reheat, remove plastic, wrap in a paper towel and microwave on High for 30 to 60 seconds.
My little one loves quiche so I thought we would give this recipe a try. Unlike a previous recipe that we tried that was disgusting that one came out quite yummy. And it's fun for the kiddo's to help out with too.
I adapted this from a recipe I found on Eating Well
5 eggs
3 egg whites
1/2 cup milk
1/2 cup shredded cheese
8oz cubed ham and turkey
1/8 tsp seasoned salt
1/2 tsp fresh ground pepper
Preheat oven to 325 degrees. Because I am lazy and don't like to scrub pots and pans I lined a regular muffin pan with paper liners and then sprayed them with pan. I really don't want these quiches to stick!
In a large measuring cup, beat the eggs and milk together along with your seasonings. I used 2% milk cause that's what was in my fridge. You could even use egg beaters if that's what floats your boat.
In the lined muffin cups, evenly distribute the cheese and the ham and turkey. I used some chopped fresh deli meat. You can use anything you love in quiche here. (Or that your picky eater kid will eat!) Sausage, mushrooms, spinach, asparagus, bacon, green onions etc. Use any kind of cheese that you like too. I used a shredded cheese blend. Next pour in your egg mixture. I had enough for 11 mini quiches.
Pop them in the oven and bake for 25 mins until nice and golden brown. Allow to cool in pan for about 5 minutes and then remove them to a wire rack. Refrigerate any leftovers for up to 3 days.
If these are a big hit in your household, make a big batch of them and you can freeze them for up to a month. Once fully cooled, wrap in plastic and place in freezer. To reheat, remove plastic, wrap in a paper towel and microwave on High for 30 to 60 seconds.
Labels:
breakfast,
Mini Quiche,
recipes
Saturday, July 23, 2011
Happy Birthday Girls!
Although I had the best of intentions to plan ahead this year, my daughter's birthday party still managed to sneak up on me. At least I managed to get the invites out thanks to this cool website called Paperless Post.
It's like a fancier version of evite. Your card even includes an envelope
The website allows you to track who has opened the invites, who has replied and send reminders to your guests.
My sweet baby girl turned 5. We also STILL needed to celebrate my other daughter's birthday. She turned 9 back in May. Her birthday always coincides with the end of the school year which makes picking a party date really difficult.
Due to a minor surgery the hubs had to have, I decided to have the party at Pump It Up. And let me tell you it was money well spent! No mess in my house and the kids LOVED it.
I took the little one over to a party supply store and she picked out some favors for goody bags. I think she did a pretty good job.
For the girls: Journal, mini paint set, mini rubix cube, mini frisbee, pencil top eraser, a package of candy, some tattoo's and some of our favorite jello flavored popcorn.
For the boys: Same as above but instead of the journal,
they got some cute cards with animals on them.
We made some jello flavored popcorn for the gift bags with a little tag that said "Thanks for poppin' in." The popcorn was supposed to be pink and purple to match our color scheme. It ended up being red and I'm not sure what you would call the second color. We didn't have time to re-do it and it still tasted yummy.
Free printable Bag Tag found here
We also planned to include these in the goody bags. However due to the fact that we made them last minute, and that it's hotter than Haides here and we didn't have any room in the fridge, they didn't dry in time for us to bag them up.
Giant marshmallows dipped in chocolate and covered in sprinkles.
Can you say Sugar Rush?
And of course we had to have cupcakes. My bad photography makes these look they have chocolate frosting on them but the cupcakes themselves were half chocolate, half vanilla and topped with a light pink or deep purple Buttercream frosting. Both sets of cupcake liners came from Michaels.
Even though I had very little to do for this party, and not all of it came out perfect, the kids had a great time. And in the end, I guess that's all that matters!


Labels:
bag tag,
free printable,
paperless post,
party
Wednesday, July 20, 2011
7up Biscuits
This biscuit recipe is my new favorite. It's quick and easy and you probably already have everything in your fridge and pantry. It makes really light and fluffy biscuits in mere minutes.
I would call this recipe semi-homemade cause it starts off with Bisquick. I stumbled across this recipe on a blog called Plainchicken.com Such a cute name. Her food looks yummy and her photography skills are much better than mine.
So here's what you need:
Yep, that's all.
2 cups of Bisquick mix
1/2 cup of sour cream
1/2 cup of 7Up.
You will also need some butter for the bottom of your pan.
Preheat your oven to 350 degrees.
In a medium size bowl, cut the sour cream into the Bisquick using a fork. Add in the 7Up and mix until just combined.
I use a large cutting board for the next part. Generously sprinkle your board (or counter top etc) with some Bisquick mix. (If you barely had two cups of Bisquick mix, like I did, just use some flour) The mixture will be pretty sticky. I also dusted my hands with flour. Pat the mixture flat (I don't recommend using a rolling pin) and cut biscuits. I didn't even bust out a cutter here - I just used a glass cause it was handy.
Melt about 1/4 cup of butter in the bottom of the pan.
If you place the biscuits close together, they will stay nice and soft on the side. I used a pastry brush and took a little butter out of the bottom and brushed the tops.
Bake for about 15 minutes and...........
Load them up with butter, honey, jam or whatever you like in your biscuit.
Labels:
7up biscuits,
biscuits,
recipes
Tuesday, July 12, 2011
Nutella Stuffed French Toast
My dad was here visiting from England for five weeks but had to return home today. My four year old was a little sad when we got home from the airport and declared that we needed to have french toast for lunch. Since the men folk are at scout camp this week, and it's just us girls now, I figured why not! And since it's bathing suit season, lets see how we can make this a little more fattening shall we? Since chocolate makes everything better - we added some Nutella.
I started out with my standard French Toast recipe:
3 eggs
1/2 cup heavy cream*
1/2 cup milk
1/4 tsp salt
1 tsp vanilla
1 tsp cinnamon
In a bowl big enough to fit the bread you will be using, lightly beat the eggs, add in the milk, cream, salt, vanilla and cinnamon and whisk lightly until everything is just blended together.
Today, because we are making french toast on demand, we are using whatever happens to be in the breadbox, which is plain old white Wonder Bread.** Take two slices of the bread of your choice and glue them together with some Nutella. (Remind your four year old not to stick the knife back in the jar after you she licks it clean!)
Heat a skillet over medium high heat. If you are like my husband or Paula Deen, or feel like this recipe does not already have enough calories for you, melt a teaspoon of butter in the bottom of the pan. I personally just like to spray it with some non stick cooking spray. Because the Wonder Bread is pretty thin, I pretty much just dipped each side of the Nutella sandwich in the egg/milk mixture and let the excess drip off. If your bread is thicker, you can let it sit in the mixture for about 30 seconds.
You know the drill here right? Fry it on each side until nice and toasty and golden brown. If you'd like a little extra sweetness or maybe you are just trying to blow your calorie counting completely out of the water, dust it lightly with some powdered sugar.
*You can use a whole cup of milk, or a whole cup of half and half or any combination of milk and cream or half and half that you would like here. I always have heavy cream in my fridge and I like the richness it adds.
**My favorite bread to use for French Toast is Wonder Bread Texas Toast. It's the perfect thickness while still being nice and soft. Day old bread tends to work better because really fresh bread can get a little soggy. You can make French Bread with any kind of bread that you love. Try making it with Cinnamon Bread or Raisin Bread. Yum!
Labels:
breakfast,
french toast,
nutella,
recipes,
snack
Thursday, July 7, 2011
Pen Pals
July 5th, 2011 Activity
Writing to our PenPals &
Practicing to sing in Sacrament Meeting
Mark off in Faith in God: Developing Talents
Next Activity: July 19th - Cancelled :(
See you August 2nd for the Mommy and Me Tea!
The current author of this blog that I like to visit to get ideas for our Activity Girls broached the idea of matching girls up from different wards to be Pen Pals. It immediately reminded me of my childhood. Remember back in the day when all correspondence was via snail mail? I lived in England at the time and had a Pen Pal in France. I loved sending and receiving letters and learning something about this girl in a different part of the world then me.
I love this idea for many reasons.
- I think it will be so much fun for the girls to get to know other girls their age in a different ward.
- Writing an old fashioned letter is a great skill for them to learn. I encouraged them to use proper punctuation and spelling. (No LOL, BFF etc)
- It passes off a requirement for Faith in God - Developing Talents
Our girls were matched up with some girls from a ward in Cedar Hills Utah.


Each girls wrote a letter on some pretty stationary. We decorated the envelopes. Before we sealed the envelopes, I (or a parent) checked each letter to make sure it didn't include too much personal info. (no last names, phone numbers, email addresses etc) Once we add in some little gifts and photos, it will be sent of to the girls leader in Utah.
Labels:
Activity Girls,
Penpals
Pool Party!
June 30th, 2011 Activity
Pool Party
Mark off in Faith in God: Just For Fun!
Next Activity: July 5th - Practice to sing in Sacrament Meeting
& Writing Letters to our Pen Pals.
Meet at 7 p.m. at the Stake Center.
This week we had to move the date of our regularly scheduled Tuesday night meeting because the Youth were attending the Temple on the same night. For the sake of parents sanity, and also because of the terrible gas prices, we try to avoid having parents running kids to all kinds of different locations.
Also, I was on vacation visiting my sister and my Co-Leader wanted to wait to have this party till I was back and boy was I glad she did!!!
This activity didn't really satisfy a requirement in the Faith in God program - It was just for fun! My Co-Leader hosted a swim party for the girls and their families at her home. We had such a blast swimming followed by a yummy dinner of BBQ'ed hamburgers and hotdogs, fresh fruit, chips and dip and the most delicious homemade macaroni and cheese. And did I mention the brownies? Chocolate doesn't really agree with me but they looked soo good, I just couldn't resist trying one! Sister Canaday was most definitely the Hostess with the Mostess!!! Thank you for opening your home to us - everyone had a great time!
Labels:
Activity Girls
Saturday, June 11, 2011
Father's Day - Folded Shirt Card
I came across this cute card for Father's Day on Martha Stewart's Website. I wanted to make these with the Activity Girls to go along with a Father's Day Gift we were making. Problem was, the instructions on the website didn't seem to make a lot of sense.
With a little bit of trial and error, I got it figured out. I started with a 12"x12" piece of scrapbook paper that I cut down to 7 1/2" x 12". Basically you can use any size that is skinny rectangle.
Have fun embellishing with a tie, bow tie, pocket or buttons!
Labels:
Father's Day
Subscribe to:
Posts (Atom)